


How to Make Ready to Wear Saree at Home?
5 minuteRead

Sarees are my one eternal favourite outfit to wear! It is easy to imagine or assume rather, that many of you reading this are on the same team as me. Haina?!
One of the most elegant and lovely clothes designed for women as Indian wear is the saree. They can be wrapped in a variety of ways depending on the occasion because they are versatile. Ready-to-wear sarees have become quite popular in recent years, as they are easy to wear and require minimal effort. If you're someone who loves sarees and wants to make your own ready-to-wear saree at home, then this blog is for you. In this article, I will guide you through the steps on how to make a ready-to-wear saree at home.
DIY ready-to-wear saree
Step 1: Choose the Fabric
The first step is to choose the fabric. You can select any fabric of your choice, but it's important to keep in mind the occasion you're planning to wear it for. If you're planning to wear it for a formal event, then you should go for a silk or chiffon fabric. If you're planning to wear it for a casual occasion, then you can go for cotton or linen fabric.
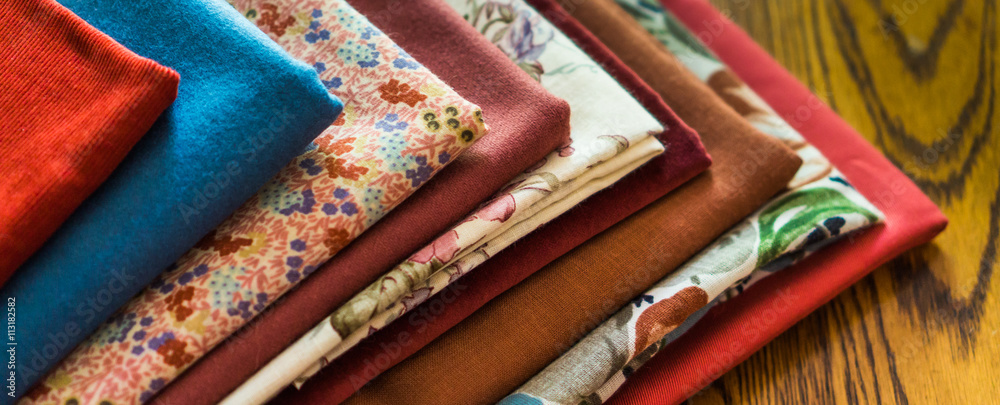
Step 2: Choose the Design
The next step is to choose the design of the saree. You can either select a printed fabric or a plain one and then add some embellishments to it. You can use lace, sequins, beads, or embroidery to add some extra details to your saree.
Step 3: Cut the Fabric
Once you have chosen the fabric and design, the next step is to cut the fabric according to your measurements. You will need to measure the length of the saree and the width of the fabric. The standard length of a saree is 5.5 meters, and the width should be around 44-45 inches. If your fabric is not wide enough, you can attach another piece of fabric to it to make it wider.

Step 4: Hem the Edges
After you have cut the fabric, the next step is to hem the edges. You can either use a sewing machine or do it by hand. This will prevent the fabric from fraying and make it look neat and tidy.

Step 5: Attach the Pallu
The next step is to attach the pallu. The pallu is the part of the saree that is draped over the shoulder. You can either attach the pallu to the saree or leave it separate. If you're attaching it, then you can use a contrasting fabric or add some embellishments to it to make it stand out.

Step 6: Add the Pleats
The next step is to add the pleats. Pleats are the folds that are made at the front of the saree. You can either make the pleats beforehand or do it while draping the saree. If you're making the pleats beforehand, then you can use safety pins to keep them in place.

Step 7: Add the Petticoat
The next step is to add the petticoat. The petticoat is the skirt that is worn underneath the saree. You can either buy a ready-made petticoat or make one at home. You can use any fabric of your choice, but it's important to choose a fabric that is comfortable and doesn't stick to the skin.

Step 8: Finish the Saree
The final step is to finish the saree. You can add some extra details like tassels or beads to the pallu to give it a more finished look. You can also add some embroidery or lace to the borders to make it look more elegant. Tadaaa readymade stitched saree is ready!

How to wear a readymade saree?
Step 1: Wear the Petticoat
The first step is to wear the petticoat(obviously!). The petticoat is a skirt that is worn underneath the saree. It should be worn high up on the waist and should fit snugly. You can also wear leggings instead of a petticoat if you prefer.
Step 2: Tie the Saree
The next step is to tie the saree. All you need to do is drape the saree around your waist, tuck in the pleats, and drape the pallu over your shoulder. You can adjust the length and the height of the pleats and the pallu according to your preference.
Step 3: Pin the Saree
Once you have tied the saree, the next step is to pin it in place. You can use safety pins to secure the pleats and the pallu to the petticoat. Make sure that the saree is pinned securely so that it doesn't come undone.
Step 4: Adjust the Saree
The final step is to adjust the saree. Check if the pleats and the pallu are in place and adjust them if needed. You can also adjust the height of the saree by pulling it up or down. Make sure that the saree is comfortable and doesn't restrict your movement.
Summing it up
Making a ready-to-wear saree at home is a fun and rewarding experience. It allows you to create a saree that is unique and customized to your liking. By following the steps mentioned above, you can create a beautiful ready-to-wear- saree at home.
 Dimpy Ajwani
I am a content writer and freelance blogger. I love and enjoy all forms of writing and reading. The motive to be on this lovely platform is to engage, support, and connect with beautiful minds. I hope you enjoy reading my blogs and find value in them.
FOLLOW + MORE BY AUTHOR


Write, Record and Answer! Consume Unlimited Content! All you need to do is sign in and its absolutely free!
Continue with one click!!By signing up, you agree to our Terms and Conditions and Privacy Policy.